Google Ads is a powerful advertising platform that helps businesses reach their target audience and promote their products or services effectively. If you're in India and looking to leverage the benefits of Google Ads, signing up on the official website is your first step towards success. In this article, we'll guide you through the process of signing up for Google Ads in India using simple language, so you can start reaching potential customers and grow your business.
Step 1: Visit the Google Ads Website:
To begin the sign-up process, open your web browser and visit the Google Ads website. You can easily find it by searching for "Google Ads" in your favorite search engine. Alternatively, you can directly access the site by typing "ads.google.com" in the address bar.
Step 2: Create a Google Account (if you don't have one):
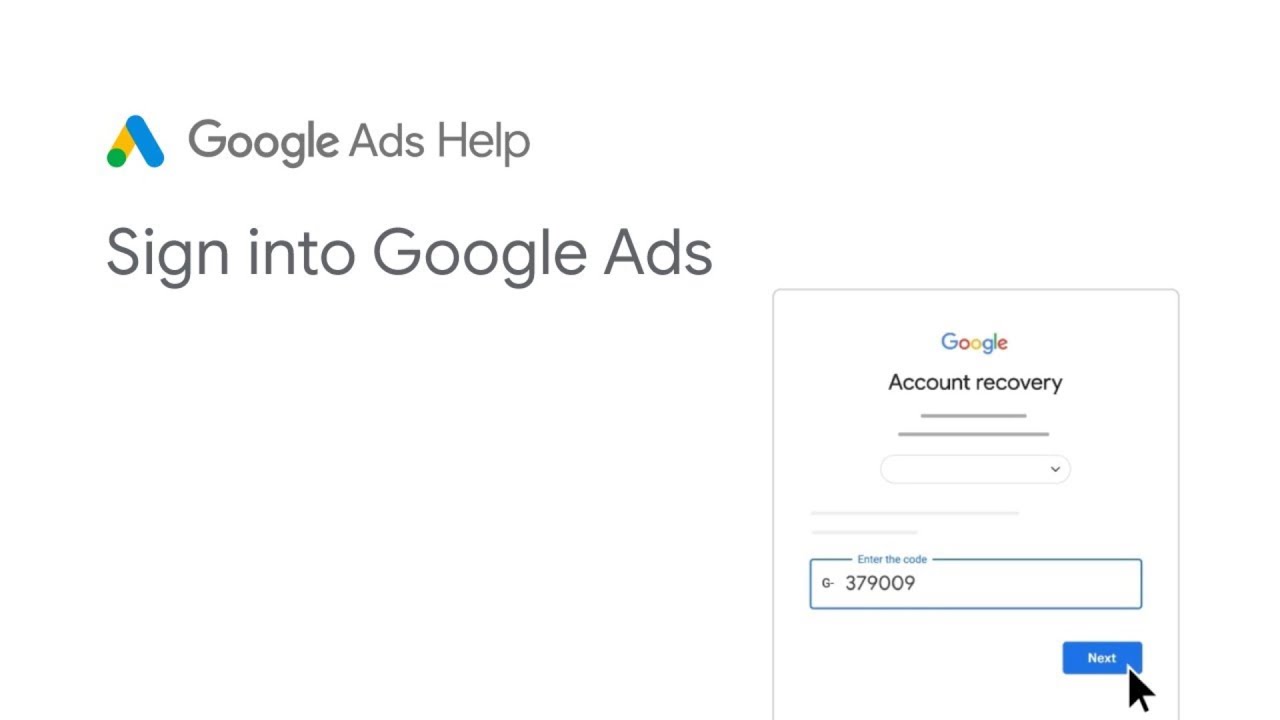
If you don't have a Google Account, you'll need to create one to proceed. Look for the "Sign In" or "Get Started" button on the Google Ads website, and click on it. Follow the instructions to create a Google Account by providing your email address, setting a password, and completing the verification process.
Step 3: Access Google Ads:
Once you have a Google Account, sign in to your account on the Google Ads website. Use the email address and password associated with your Google Account to log in.
Step 4: Set Up Your First Campaign:
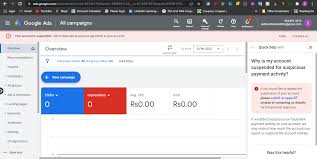
After logging in, you'll be taken to the Google Ads dashboard. Here, you can start setting up your first advertising campaign. A campaign is a collection of ad groups, keywords, and ads that target a specific audience.
Step 5: Define Your Advertising Goals:
Before creating your campaign, it's important to define your advertising goals. Ask yourself what you want to achieve through your ads. Whether it's increasing website traffic, generating leads, or driving sales, clarifying your objectives will help you optimize your campaign.

Step 6: Choose Your Target Audience and Budget:
Next, you'll need to select your target audience and set a budget for your campaign. Define the geographic location, demographics, and interests of the people you want to reach with your ads. Additionally, determine your daily or monthly budget, which is the maximum amount you're willing to spend on your campaign.
Step 7: Create Your Ads:
Once you've defined your audience and budget, it's time to create your ads. Write compelling ad copy that highlights your products or services' unique selling points. Make sure to include relevant keywords that potential customers are likely to search for.
Step 8: Launch and Monitor Your Campaign:
After creating your ads, review everything to ensure accuracy and then launch your campaign. Monitor the performance of your ads regularly to assess their effectiveness. Google Ads provides detailed analytics and reporting tools to track clicks, impressions, and conversions.
Step 9: Choose Your Advertising Network:
While setting up your campaign, you'll have the option to choose the advertising network where your ads will be displayed. Google offers two primary networks: the Search Network and the Display Network. The Search Network allows your ads to appear on Google search results pages when people search for keywords related to your business. The Display Network, on the other hand, places your ads on websites, mobile apps, and videos across the internet. Consider your advertising goals and target audience when selecting the appropriate network for your campaign.
Step 10: Set Bid Strategies and Ad Extensions:
Bid strategies determine how you want to pay for and optimize your ads. Google Ads offers various bidding options, such as manual CPC (Cost-Per-Click) and automated bidding strategies like target CPA (Cost-Per-Acquisition) or maximize conversions. Choose the bidding strategy that aligns with your campaign objectives and budget.
Additionally, take advantage of ad extensions to enhance your ads. Ad extensions provide additional information and options for users to engage with your ad, such as call buttons, site links, or location details. They can improve the visibility and performance of your ads, so consider adding relevant extensions to make your ads more compelling.
Step 11: Utilize Ad Formats and Ad Scheduling:
Google Ads offers different ad formats to suit your advertising needs. You can create text ads, image ads, video ads, or even responsive ads that automatically adjust their size and appearance to fit the available ad space. Experiment with different ad formats to find what resonates best with your audience and drives the desired results.
Furthermore, consider ad scheduling to control when your ads appear. You can choose specific days of the week or times of the day when you want your ads to be shown. Ad scheduling allows you to target your audience during the most relevant times, increasing the chances of reaching potential customers when they are actively searching for products or services like yours.
Step 12: Optimize and Refine Your Campaign:
Once your campaign is up and running, it's essential to continuously optimize and refine it. Monitor the performance of your ads using the reporting tools provided by Google Ads. Identify trends, track conversions, and make data-driven adjustments to improve the effectiveness of your campaign. Experiment with different ad variations, keywords, and targeting options to find what works best for your business.
Step 13: Use Keyword Research:
Keyword research is crucial for the success of your Google Ads campaign. Identify relevant keywords that align with your business offerings and are commonly used by your target audience when searching online. Google Ads provides keyword research tools to help you discover popular keywords and estimate their search volume. Incorporate these keywords into your ad copy and target them in your campaign to increase the visibility of your ads.
Step 14: Implement Conversion Tracking:
Tracking conversions is essential to measure the effectiveness of your Google Ads campaigns. Conversion tracking allows you to monitor specific actions taken by users, such as purchases, sign-ups, or form submissions, that result from clicking on your ads. By implementing conversion tracking, you can determine which ads and keywords are driving valuable actions, enabling you to optimize your campaigns accordingly and maximize your return on investment (ROI).
Step 15: Explore Remarketing:
Remarketing is a powerful feature offered by Google Ads that allows you to re-engage with users who have previously interacted with your website or mobile app. By placing a remarketing tag on your website, you can show targeted ads to users who have shown interest in your products or services, increasing the likelihood of conversion. Remarketing is an effective way to stay top-of-mind with potential customers and nurture them through the buying process.
Step 16: Seek Professional Support:
Managing Google Ads campaigns can be complex, especially as your advertising efforts scale. If you find yourself overwhelmed or want to optimize your campaigns for better results, consider seeking professional support. Google has certified Google Ads partners and agencies who are trained and experienced in managing successful campaigns. They can provide valuable insights, strategic guidance, and hands-on campaign management to help you achieve your advertising goals.
Step 17: Stay Updated with Google Ads Updates:
Google Ads regularly introduces new features, tools, and updates to enhance the advertising experience and improve campaign performance. It's essential to stay updated with these changes to leverage the latest advancements and stay competitive. Follow official Google Ads blogs, subscribe to newsletters, and participate in relevant forums or webinars to stay informed about industry best practices and optimize your campaigns accordingly.
Step 18: Utilize Ad Extensions:
Ad extensions are additional pieces of information that can be added to your ads to make them more informative and engaging. Google Ads offers various ad extensions, such as call extensions, location extensions, sitelink extensions, and more. These extensions provide users with additional opportunities to interact with your ad and improve its performance. Experiment with different ad extensions to enhance the visibility and impact of your ads.
Step 19: A/B Test Your Ads:
A/B testing, also known as split testing, is a valuable technique to optimize your ads and improve their performance. Create multiple variations of your ads with different headlines, ad copy, or visuals, and run them simultaneously. Monitor the results and identify which version performs better in terms of click-through rates, conversions, or other key metrics. A/B testing allows you to make data-driven decisions and continually refine your ads for better outcomes.
Step 20: Leverage Local Targeting:
If your business caters to a specific geographical area, leverage local targeting options in Google Ads. Define your target location and tailor your ads to reach customers in that specific region. Local targeting helps you focus your advertising efforts on the audience that is most likely to convert, improving the efficiency of your campaigns and maximizing your return on investment.
Step 21: Monitor and Adjust Your Budget:
Regularly monitor the performance of your campaigns and analyze their cost-effectiveness. Keep a close eye on your budget and ensure that you are allocating your advertising spend efficiently. If certain campaigns or keywords are not generating satisfactory results, consider adjusting your budget allocation accordingly. By optimizing your budget, you can achieve a better balance between cost and performance.
Step 22: Stay Updated on Policies and Guidelines:
Google Ads has specific policies and guidelines that advertisers must adhere to. It's essential to stay updated on these policies to ensure compliance and avoid any disruptions to your campaigns. Familiarize yourself with the advertising policies, ad formats, and content restrictions to create ads that meet Google's guidelines and maintain a high-quality advertising experience.
Step 23: Seek Help from Google Ads Support:
If you encounter any challenges or have questions during your Google Ads journey, don't hesitate to reach out to Google Ads support. They have a dedicated support team available to assist you with any queries or technical issues you may face. Whether you need help with campaign setup, billing inquiries, or troubleshooting, Google Ads support can provide the guidance you need to overcome obstacles and make the most of the platform.

Welcome to our comprehensive overview and informational guide on Step-by-step guide for signing up for Google Ads in India on the official site. In this detailed article, we provide deep insights, historical context, and practical guidelines about this trending topic. Our editorial board has gathered facts from verified sources to help you understand all aspects of the subject matter. We examine current trends, future developments, and real-world applications to keep you ahead. Whether you are researching for educational purposes, business planning, or general knowledge, this guide offers a solid foundation. Explore the detailed analysis, tabular statistics, and answers to frequently asked questions below to expand your understanding.
Step 1: Visit the Google Ads Website:
Open your web browser and go to the official Google Ads website. You can find it by searching for "Google Ads" in your preferred search engine. Alternatively, you can directly access the site by typing "ads.google.com" in the address bar.
Step 2: Sign in with Your Google Account:
To proceed with signing up for Google Ads, you'll need a Google Account. If you already have one, click on the "Sign In" button on the top right corner of the Google Ads homepage. Enter your Google Account credentials (email address and password) and click "Next" to sign in.
If you don't have a Google Account, click on the "Create an account" button on the top right corner of the page. Follow the instructions to create a new Google Account by providing your email address, creating a password, and completing the verification process.
Step 3: Access Google Ads Dashboard:
Once you've signed in to your Google Account, you'll be directed to the Google Ads dashboard. This is where you'll manage your ad campaigns. Take some time to familiarize yourself with the different tabs and options available.
Step 4: Set Up Your First Campaign:
To create your first ad campaign, click on the "+ Campaign" button on the dashboard. Select the campaign type based on your advertising goals. Google Ads provides different campaign types, such as Search Network, Display Network, Video, Shopping, and more. Choose the type that aligns with your objectives.
Step 5: Configure Campaign Settings:
After selecting the campaign type, you'll need to configure the campaign settings. Provide a name for your campaign, choose the geographic location where you want your ads to appear, and set your budget for daily or monthly spending. You can also define other settings such as languages, bidding options, and start/end dates for your campaign.
Step 6: Select Your Target Audience:
Specify the target audience for your campaign. Define the demographics, interests, and behaviors of the people you want to reach with your ads. Google Ads provides advanced targeting options, allowing you to narrow down your audience based on factors like age, gender, interests, and more. Refine your targeting to ensure your ads are displayed to the most relevant audience.
Step 7: Choose Keywords:
Select relevant keywords for your campaign. These are the words or phrases that users are likely to search for when looking for products or services like yours. Use keyword research tools provided by Google Ads to identify popular and relevant keywords. Incorporate these keywords into your ad copy and target them in your campaign to increase the chances of your ads appearing in relevant search results.
Step 8: Create Your Ad Groups:
Organize your ads into ad groups. An ad group consists of a set of ads that share a similar theme or target specific keywords. Divide your campaign into different ad groups to better manage and optimize your ads. Create compelling ad copy for each ad group that effectively communicates your message and entices users to click on your ads.
Step 9: Write Your Ad Copy:
Craft persuasive ad copy that captures the attention of your audience and encourages them to take action. Write engaging headlines, compelling descriptions, and include a strong call-to-action. Ensure your ad copy aligns with your campaign objectives and is relevant to the keywords and audience you've chosen.
Step 10: Set Bids and Ad Extensions:
Determine your bidding strategy for your ads. You can choose to manually set bids or use automated bidding strategies based on your campaign goals. Set the maximum amount you're willing to pay for each click on your ads.
Additionally, consider using ad extensions to enhance your ads. Ad extensions provide additional information and options to users, such as call buttons, sitelink extensions, or location details. They can improve the visibility and performance of your ads, so take advantage of these features to make your ads more compelling.
Step 11: Review and Launch Your Campaign:
Before launching your campaign, carefully review all the settings, ad copy, keywords, and budgets. Ensure everything is accurate and aligned with your objectives. Double-check your targeting, bidding options, and ad extensions. Once you're satisfied, click on the "Launch" or "Save and Continue" button to activate your campaign.
Step 12: Monitor and Optimize Your Campaign:
After launching your campaign, monitor its performance regularly. Use the reporting tools and analytics provided by Google Ads to track key metrics such as clicks, impressions, conversions, and return on investment. Identify areas for improvement and make data-driven optimizations to maximize the effectiveness of your campaign. Experiment with different ad variations, keywords, and settings to find the best combination that generates the desired results.
Step 13: Set Conversion Tracking:
To measure the effectiveness of your Google Ads campaigns and track the actions users take on your website, it's essential to set up conversion tracking. Conversion tracking allows you to see which ads and keywords lead to valuable actions, such as purchases or form submissions. Set up conversion tracking by placing a snippet of code, known as a conversion tracking tag, on your website. This tag tracks when a user completes a specific action, providing you with valuable insights to optimize your campaigns and maximize your ROI.
Step 14: Experiment with Ad Formats:
Google Ads offers various ad formats to suit different advertising goals and platforms. Experiment with different ad formats to find the ones that resonate best with your audience. You can create text ads, image ads, video ads, or responsive ads that automatically adapt to fit different screen sizes. Consider the preferences of your target audience and the platforms where your ads will be displayed to determine the most effective ad formats for your campaigns.
Step 15: Utilize Ad Scheduling:
Ad scheduling allows you to specify the days and times when your ads should be shown. This feature is particularly useful if your target audience is active during specific hours or days of the week. By using ad scheduling, you can optimize your budget by showing your ads when your potential customers are most likely to see and engage with them. Experiment with different ad scheduling options to find the optimal times for displaying your ads and maximizing their impact.
Step 16: Implement Remarketing Campaigns:
Remarketing campaigns are a powerful tool for re-engaging with users who have previously interacted with your website or mobile app. By placing a remarketing tag on your site, you can show targeted ads to these users as they browse other websites or use other apps within the Google Display Network. Remarketing helps you stay top-of-mind with potential customers, reminding them of your products or services and increasing the likelihood of conversion. Create tailored ads specifically designed for your remarketing audience to encourage them to revisit your site and complete their desired actions.
Step 17: Test and Refine Your Landing Pages:
A well-optimized landing page is crucial for converting ad clicks into valuable actions. Continuously test and refine your landing pages to improve their performance. Make sure your landing pages are aligned with the messaging and offer in your ads. Optimize their loading speed, layout, and content to provide a seamless user experience. Test different elements, such as headlines, calls-to-action, and form fields, to identify the most effective combination that drives conversions.
Step 18: Stay Up-to-Date with Google Ads Resources:
Google Ads is constantly evolving, introducing new features and updates to improve its functionality. Stay up-to-date with the latest resources and information provided by Google Ads. Subscribe to official Google Ads blogs, follow their social media accounts, and participate in webinars or training sessions to stay informed about industry trends, best practices, and new features. This will help you make the most of the platform and stay ahead of the competition.
Step 19: Monitor Competitor Ads and Keywords:
Keep an eye on your competitors' ads and keywords to gain insights and stay competitive. Use tools like Google Ads Auction Insights or third-party competitive analysis tools to identify which competitors are bidding on similar keywords and how their ad performance compares to yours. Analyzing competitor ads can help you identify opportunities to differentiate your own ads and refine your bidding and targeting strategies.
Step 20: Test Different Ad Variations:
Continually test different variations of your ads to optimize their performance. Experiment with alternative headlines, descriptions, call-to-actions, and even visual elements to see which combinations resonate best with your target audience. A/B testing can help you identify the most effective ad elements and refine your messaging to drive higher click-through rates and conversions.
Step 21: Implement Ad Group and Campaign-Level Negative Keywords:
Negative keywords are search terms that you want to exclude from triggering your ads. By adding negative keywords, you can prevent your ads from appearing for irrelevant searches, thus improving the relevance and targeting of your campaigns. Implement negative keywords at both the ad group and campaign levels to ensure your ads are displayed to the most relevant audience and prevent wasted ad spend.
Step 22: Use Ad Customizers:
Ad customizers allow you to dynamically update ad content based on specific attributes, such as location, device, or time. This feature enables you to create highly relevant and personalized ads at scale. For example, you can dynamically insert the user's location into the ad copy, creating a sense of local relevance. Explore the various ad customizer options available and leverage them to deliver more tailored and engaging ads to your target audience.
Step 23: Leverage Smart Bidding Strategies:
Google Ads offers smart bidding strategies powered by machine learning to optimize your ad bids automatically. These strategies use historical data and real-time signals to adjust bids and maximize your desired outcomes, such as conversions or conversion value. Experiment with different smart bidding strategies, such as Target CPA (Cost-Per-Acquisition) or Target ROAS (Return on Ad Spend), to automate bid optimization and improve the efficiency of your campaigns.
Step 24: Regularly Review and Refine Your Campaigns:
Ongoing monitoring and optimization are crucial for the success of your Google Ads campaigns. Review the performance metrics regularly and make data-driven decisions to refine your campaigns. Adjust your bids, pause underperforming keywords or ads, and allocate budget to top-performing campaigns. Continually test new strategies, explore new features, and stay responsive to changes in your industry and audience behavior.
Step 25: Seek Professional Assistance, if Needed:
Managing successful Google Ads campaigns can be complex, especially for businesses with limited resources or expertise. If you require additional support, consider working with certified Google Ads professionals or agencies. They can provide expert guidance, assist with campaign setup and management, and help you optimize your ad performance. Collaborating with professionals can save you time, ensure efficient campaign execution, and help you achieve better results.

Google Ads India Sign-up on the Official Site:
To sign up for Google Ads in India, visit the official Google Ads website (ads.google.com). Click on the "Sign In" button and either sign in with your existing Google Account or create a new one. Once signed in, you can set up your first campaign and start advertising to reach your target audience in India.
Google Ads ₹2000 Credit Coupon Code in India:
Google occasionally offers promotional coupon codes that provide ad credits to new advertisers. These codes may offer a credit of ₹2000 to use towards your Google Ads campaigns. To redeem such a coupon code, follow the instructions provided with the code during the sign-up or billing setup process.
Google Ads Coupon Code in India:
Google Ads coupon codes are promotional codes that offer ad credits to new advertisers. These codes can be redeemed during the sign-up or billing setup process. While specific coupon codes may vary, they generally provide free advertising credits that you can use to offset your advertising costs on Google Ads in India.
Google Ads Promo Code in India:
Google Ads occasionally offers promotional codes, also known as promo codes, that provide special offers or discounts to advertisers. These codes can be redeemed during the sign-up or billing setup process. Promo codes may offer various benefits, such as ad credits, discounted rates, or bonus features for your Google Ads campaigns in India.
AdWords India (Now Google Ads):
AdWords was the previous name for Google's online advertising platform. It has since been rebranded as Google Ads. Advertisers in India can use Google Ads to create and manage their online advertising campaigns, reaching their target audience through various platforms like Google search, partner websites, YouTube, and more.
Google Ads ₹2000 Credit in India:
Google occasionally offers ad credits, such as ₹2000 credits, to new advertisers in India as a promotional incentive. These credits can be applied to your Google Ads account and used towards your advertising costs, helping you get started with your campaigns and reach your target audience effectively.
Google AdWords India:
Google AdWords (now Google Ads) is a powerful online advertising platform provided by Google. Advertisers in India can use Google Ads to create, manage, and optimize their ad campaigns, reaching their target audience through different platforms and targeting options.
Google Ads ₹20,000 Credit Coupon Code in India:
Similarly to the ₹2000 credit coupon code, Google occasionally provides promotional coupon codes that offer higher ad credits, such as ₹20,000, for new advertisers in India. These coupon codes can be redeemed during the sign-up or billing setup process to receive the corresponding ad credit.
Ads Google India:
"Ads Google India" refers to the Google Ads platform in India. It is an online advertising platform where businesses can create and manage their ad campaigns to reach their target audience in India. With Ads Google India, advertisers can advertise on Google search, partner websites, YouTube, and more.
Google Ads Free Credit in India:
Google sometimes offers free ad credits as part of promotional campaigns in India. These credits allow advertisers to run ads without incurring immediate costs, up to the value of the credit. The specific details and availability of such free credits may vary, and they are usually available to new advertisers.
Google Ads Cost in India:
The cost of advertising on Google Ads in India varies depending on several factors, including your bidding strategy, competition for keywords, ad quality, and targeting options. Google Ads operates on a pay-per-click (PPC) model, meaning you only pay when someone clicks on your ad. The cost per click (CPC) can range from a few rupees to higher amounts, depending on the competitiveness of the keywords and industry.
Google Ads Pricing in India:
Google Ads pricing in India is determined by the bidding system, where advertisers compete for ad placements based on their bids and ad quality. The pricing is influenced by factors such as the keywords, targeting options, ad formats, and competition within your industry. You have control over your budget and can set daily or monthly spending limits to align with your advertising goals and financial resources.
Google Ads Charges in India:
Google Ads charges are based on the cost-per-click (CPC) model, where you pay each time someone clicks on your ad. The charges depend on factors like keyword competitiveness and the bidding strategy you choose. Additionally, Google Ads may have service fees or charges for certain advanced features, such as display ad creation or specialized support. It's important to review the billing details and terms provided by Google Ads to understand the specific charges associated with your campaigns.
Google Ads Cost Calculator in India:
Google Ads does not provide an official cost calculator. However, you can estimate your potential costs by using the Google Ads Keyword Planner tool. This tool provides insights into the average cost per click (CPC) and search volume for specific keywords, helping you plan your budget and estimate potential costs for your campaigns.
Best Google Ads Agency in India:
There are several reputed Google Ads agencies in India that offer professional services to help businesses optimize their ad campaigns. The "best" agency for you would depend on your specific needs, budget, and industry. When choosing an agency, consider factors such as their experience, client reviews, expertise in your industry, and the range of services they offer.
Google Ads Company in India:
A Google Ads company in India refers to an agency or service provider that specializes in managing and optimizing Google Ads campaigns for businesses. These companies offer expertise in creating effective ad campaigns, keyword research, ad copywriting, campaign optimization, and reporting. They can help businesses maximize their ROI and achieve their advertising goals on the Google Ads platform.
Google Ads Offer in India:
Google Ads periodically offers promotional offers and incentives for advertisers in India. These offers may include ad credits, discounted rates, or special features. The specific details and availability of these offers can vary, so it's advisable to check the Google Ads website or promotional announcements for the latest information.
Google Ads Mumbai:
Google Ads Mumbai refers to businesses and advertisers in Mumbai, India, who are utilizing the Google Ads platform for their online advertising campaigns. Advertisers in Mumbai can leverage Google Ads to reach their target audience, increase brand visibility, and drive conversions in the bustling metropolitan city.
Google Ads Company in Chennai:
Similarly, a Google Ads company in Chennai refers to an agency or service provider in Chennai, India, specializing in managing and optimizing Google Ads campaigns. These companies assist businesses in Chennai with their online advertising strategies, helping them effectively reach their target audience and achieve their marketing objectives.
Google Ads Promotional Code in India:
A Google Ads promotional code in India is a special code provided by Google or its partners that offers promotional benefits, such as ad credits or discounts, to new advertisers. These codes can be redeemed during the sign-up or billing setup process to avail of the promotional offer. The specific terms and conditions of promotional codes may vary, so it's important to review the details provided with the code.
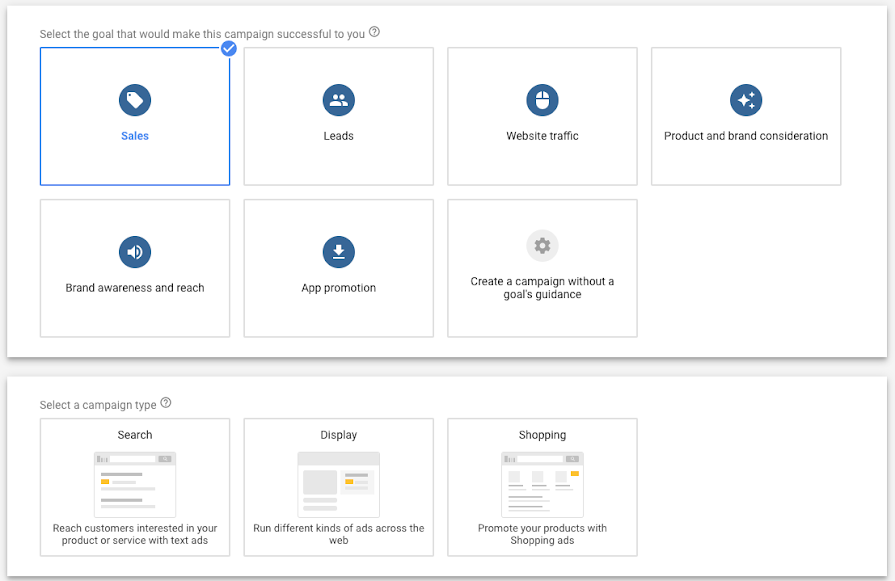
Go to ads.google.com: Open your web browser and enter "ads.google.com" in the address bar. Press "Enter" or click on the search button to access the Google Ads sign-in page.
Sign in with your Google Account: If you already have a Google Account, use your email address and password to sign in. If you don't have a Google Account, you will need to create one first.
Access Google Ads dashboard: After signing in, you'll be redirected to the Google Ads dashboard, where you can manage your advertising campaigns, set budgets, create ads, and monitor performance.
Google Ads is a powerful online advertising platform that allows businesses to create and display ads on Google's search results and partner websites. It provides various targeting options to reach specific audiences, and advertisers can set their budgets and pay for ads based on clicks or impressions.
Q: How much Google Ads cost per click in India?
Ans: Google adwords cost per click, view or impression on your ads. It depends upon CPC, like if the keywords Avg. CPC is ₹20, then for 10 clicks, Google ads cost will be Rs. 200.
Q: How Google Ads work in India?
Ans: We'll display your ads when people search for products or services like yours. Your ads can appear on Google Search and Maps, and across our network of partner sites. You'll pay for results, like when people click your ad to call your business, visit your website, or get directions to your store.
Q: How much is 1,000 views on Google Ads?
Ans: Roughly $0.2 – $2.5 per 1,000 views. Although it depends on many factors including the content of your site, location of your users, time on site and device breakdown. Use our AdSense revenue calculator above to find out how much you could earn with your website.
Q: What is the minimum amount for Google Ads?
Ans: There is no minimum spend on Google Ads, but it's nearly impossible to benefit from a $2 or $5 as daily budget. Over the years, our strategists have regularly heard the following argument: I just want to test with a small budget, and if it works, then I will increase my budget.
Q: How to get 2000 rupees from Google Ads?
Ans: Sign in to your Google Ads account.
Click the tools icon, and under "Billing" select Promotions.
Click the blue plus button.
Enter your promotional code.
Click Save.
Q: How to get 2000 rupees from Google Ads?
Ans: Sign in to your Google Ads account.
Click the tools icon, and under "Billing" select Promotions.
Click the blue plus button.
Enter your promotional code.
Click Save.
Q: How do I check my ads?
Ans: In your Google Ads account, click the Campaigns icon.
Find the list of your ads you want to check status in the Ads page. To check an assets status, go to the Assets page.
To check an ad or asset status, review the “Status” column.
Q: How to earn money from Google?
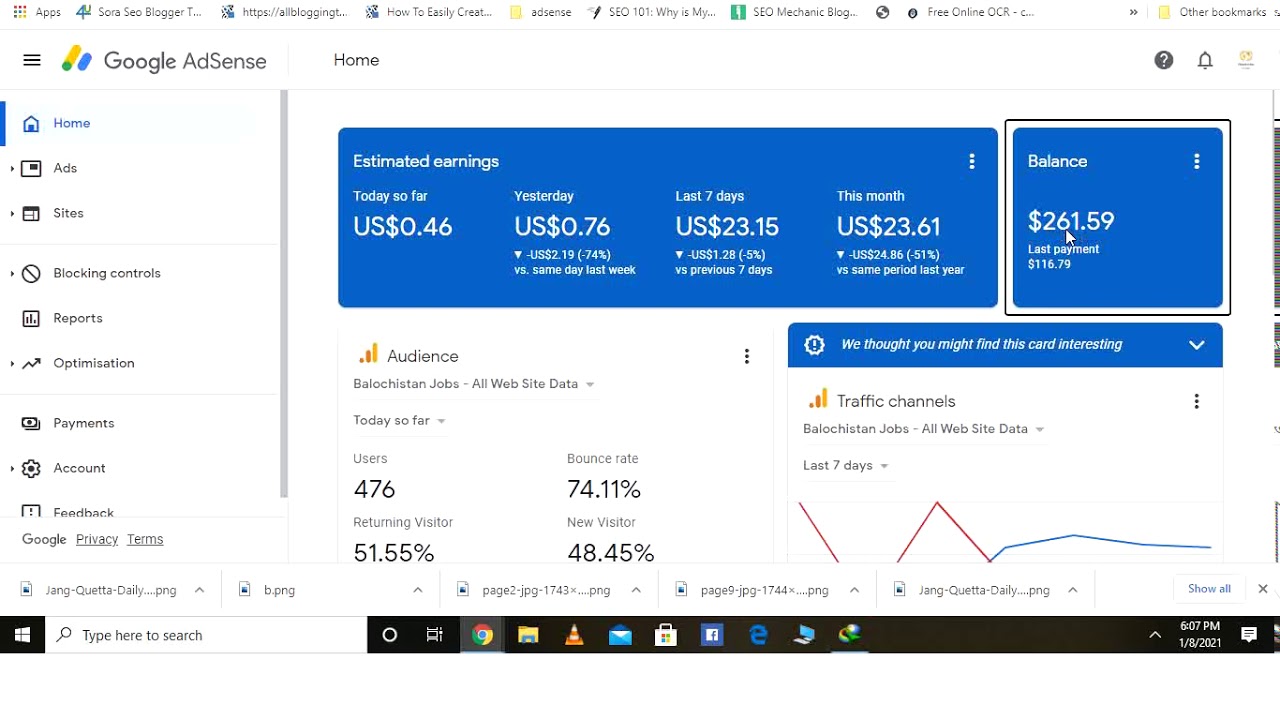
Ans: The two things you need to make money with AdSense are great content and a lot of traffic. In terms of content, there are two types of content. There is content that attracts new people to your site every day, and there is content that brings visitors back every day.
Q: How do I sign up for Google Ads in India?
Ans: To sign up for Google Ads in India, visit the official Google Ads website and click on the "Sign In" button. Sign in with your Google Account or create a new account if you don't have one. Once signed in, you can set up your first campaign and start advertising.

Q: Is there a cost to sign up for Google Ads in India?
Ans: Signing up for Google Ads is free. However, running ad campaigns comes with costs as you pay for clicks or impressions on your ads. You can set your own budget and control your ad spend based on your advertising goals and financial capabilities.
Q: What are the payment options available for Google Ads in India?
Ans: Google Ads in India supports various payment options, including credit cards, debit cards, net banking, and other online payment methods. You can choose the payment method that is convenient for you during the billing setup process.
Q: Are there any minimum spending requirements to sign up for Google Ads in India?
Ans: Google Ads does not have a minimum spending requirement for signing up. You have full control over your budget and can start with any amount that suits your business objectives.
Q: Can I advertise my business on Google Ads even if I have a small budget?
Ans: Yes, Google Ads is suitable for businesses with small budgets. You can set a daily or monthly budget that aligns with your financial resources. Google Ads provides flexibility, allowing you to adjust your budget at any time based on your needs and campaign performance.
Q: What are the targeting options available for Google Ads in India?
Ans: Google Ads provides various targeting options for advertisers in India. You can target specific locations, languages, demographics, interests, and even specific devices to reach your desired audience effectively.
Q: Can I sign up for Google Ads and run campaigns without any prior advertising experience?
Ans: Yes, you can sign up for Google Ads and run campaigns without prior advertising experience. The Google Ads platform provides intuitive tools and resources to guide you through the process. However, it's advisable to familiarize yourself with basic advertising concepts and best practices to optimize your campaigns effectively.
Q: Can I get help or support if I encounter issues during the sign-up process or while running my campaigns?
Ans: Yes, Google Ads offers support options to assist advertisers in India. You can access online resources, such as help center articles, guides, and tutorials. Additionally, you can reach out to Google Ads support through their online support channels for assistance with technical issues or account-related queries.
Q: What is Google Ads?
Ans: Google Ads is an online advertising platform provided by Google that allows businesses to display their ads on Google search results pages, partner websites, YouTube, and other platforms. It helps businesses reach their target audience and promote their products or services effectively.
Q: How do I sign up for Google Ads in India?
To sign up for Google Ads in India, visit the official Google Ads website and click on the "Sign In" button. Sign in with your Google Account or create a new account if you don't have one. Once signed in, you can set up your first campaign and start advertising.
Q: How much does it cost to advertise on Google Ads in India?
Ans: The cost of advertising on Google Ads in India varies depending on various factors, such as your targeting settings, competition for keywords, and bidding strategy. You have control over your budget and can set a daily or monthly limit. You only pay when someone clicks on your ad or interacts with it, following the cost-per-click (CPC) or cost-per-impression (CPM) model.
Q: What are the payment options available for Google Ads in India?
Ans: Google Ads in India supports various payment options, including credit cards, debit cards, net banking, and other online payment methods. You can choose the payment method that is convenient for you during the billing setup process.
Q: How can I target specific locations with Google Ads in India?
Google Ads provides targeting options to help you reach specific locations in India. You can target by cities, regions, or even specific areas within a radius. Additionally, you can exclude certain locations from your targeting if you want to focus on a particular audience.
Q: What are the ad formats available on Google Ads in India?
Ans: Google Ads offers various ad formats to suit different advertising goals and platforms. You can create text ads, image ads, video ads, responsive ads, app promotion ads, and more. Each format has its own specifications and requirements.
Q: Can I advertise my business on Google Ads in India with a small budget?
Ans: Yes, Google Ads is suitable for businesses with small budgets. You have full control over your budget and can set a daily or monthly limit that aligns with your financial resources. It's advisable to start with a smaller budget and optimize your campaigns as you gather data and insights.
Q: Can I track the performance of my ads on Google Ads in India?
Ans: Yes, Google Ads provides robust tracking and reporting features. You can track metrics such as impressions, clicks, conversions, and more. Conversion tracking allows you to measure the effectiveness of your ads in driving desired actions, such as purchases or form submissions.
Pick the next article in this topic — that is how a magazine issue is meant to be used.
